Put the line on the map.
Draw the drill path between your proposed entry and exit. Keep the route grounded in its site context.
It really is this easy: draw your bore line on the map, add your crossings, and HDD Studio pulls in the topography. Your route, crossing context and ground profile come together—ready to develop the bore from point to point.
Working toolkit · public launch coming soon
Less setup between your route
and a useful bore design.
Mark the bore route. Add road, rail, river or utility crossings. HDD Studio brings in the topography for the route, so you can start shaping the shot.
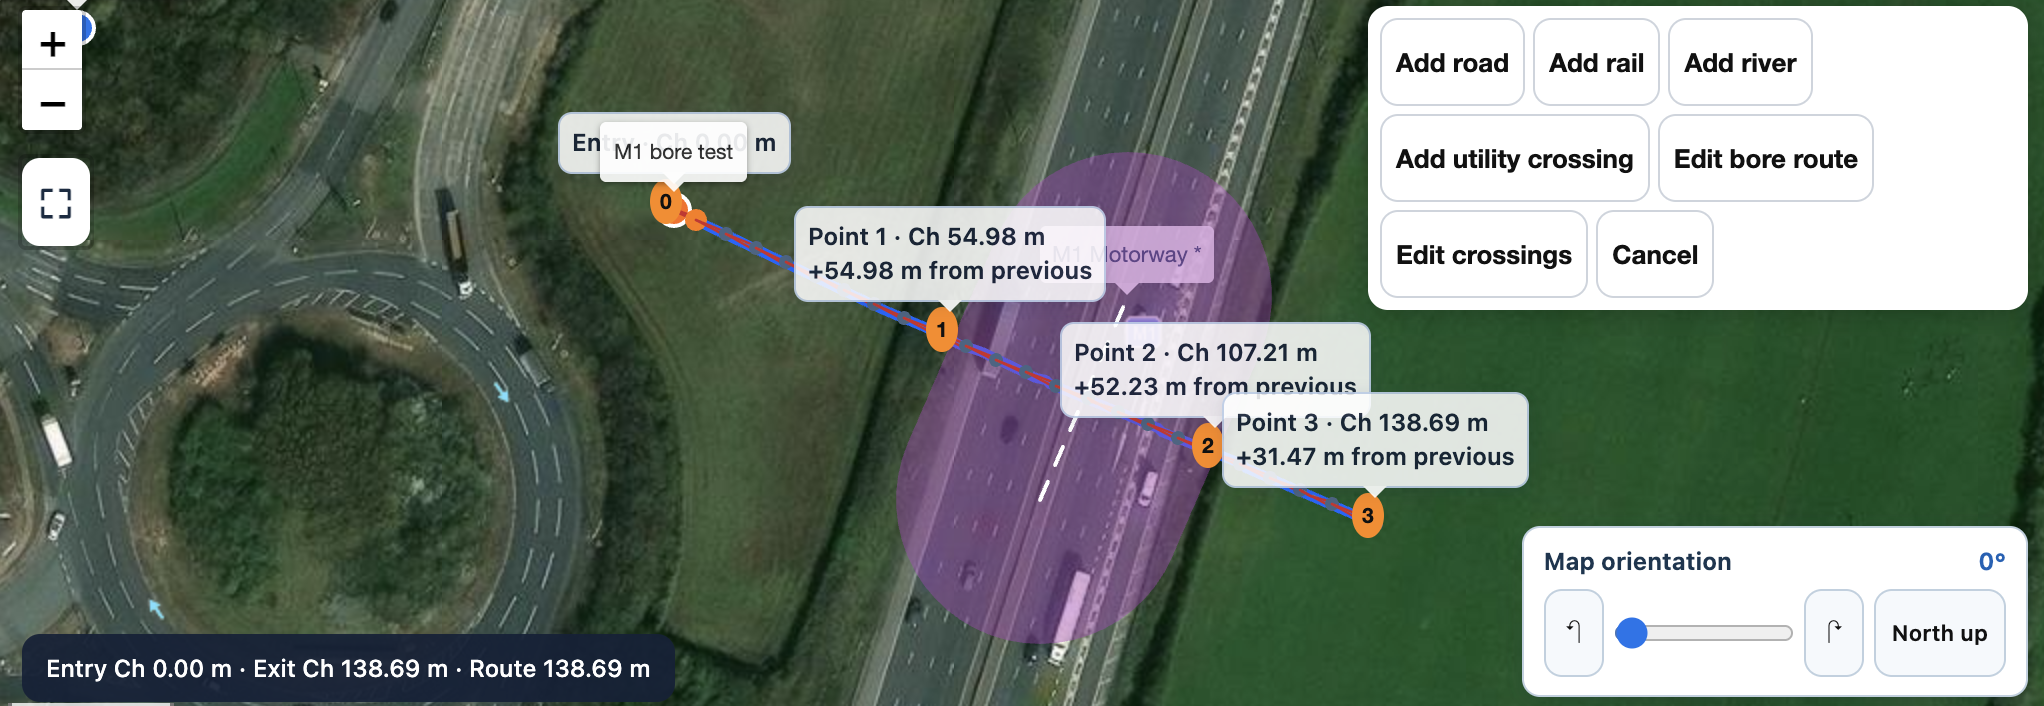
Shown here: drawing the route and crossing on the map. HDD Studio uses the route to retrieve automatic terrain context. Automatic topo is not survey-grade; supported CAD survey imports are available when surveyed detail is required.
See the actual topo and bore profile ↓There it is: the ground profile, the crossing and the bore in one view. Move from map input to the profile, then refine the route and inspect the rods, pitch, depth and chainage.
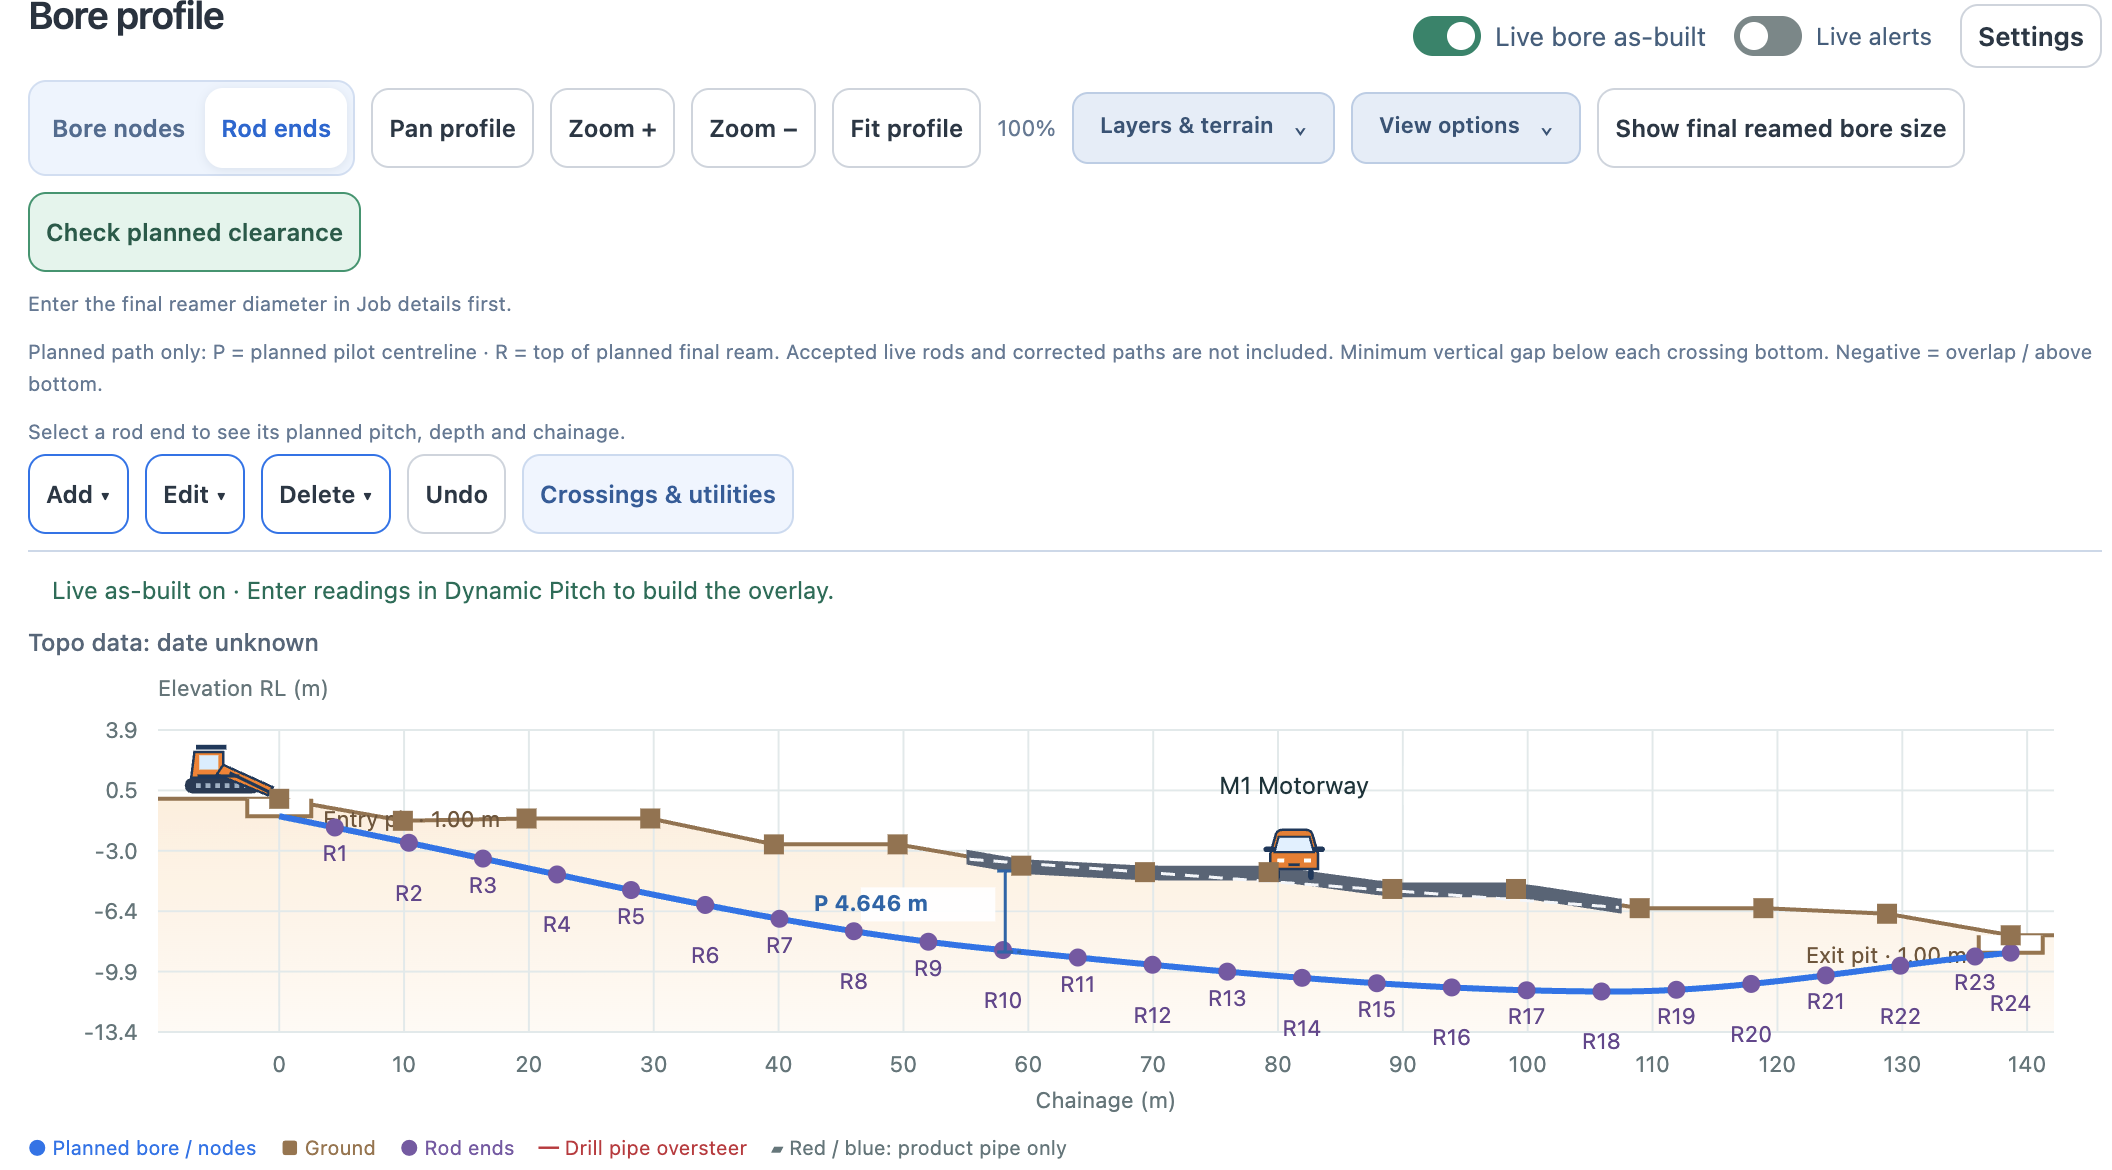
Example planned bore with automatic terrain and a mapped crossing. Automatic topo provides planning context, not survey-grade data.
Now see the shot in 3D ↓Rotate the drill shot and topographic profile in the app’s full 3D view. Inspect the bore from different angles and see the relationship between the ground surface, rod-by-rod route, entry and exit.
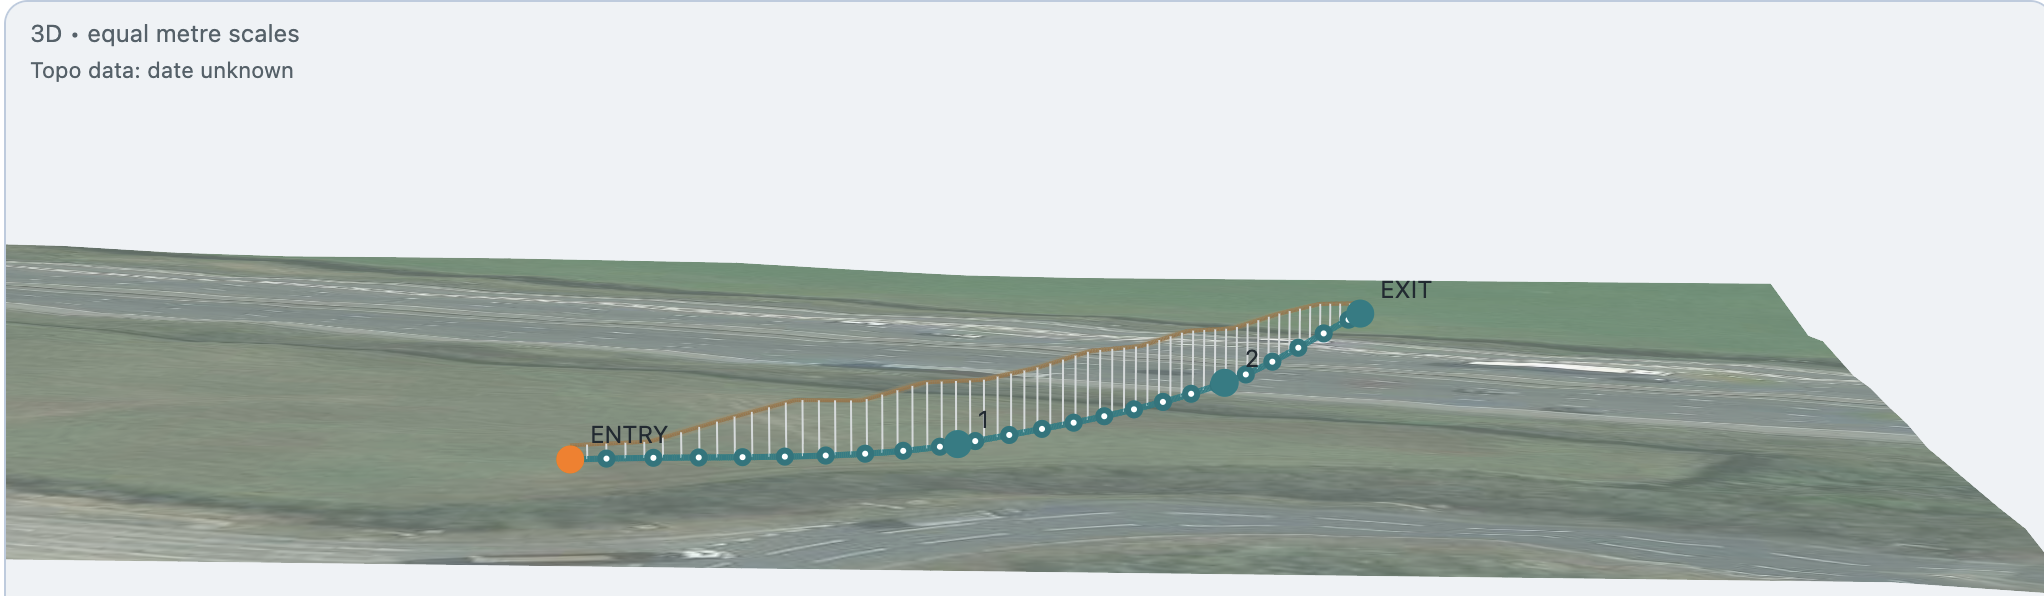
A real screenshot of the app’s rotational 3D viewer. Automatic topography provides planning context, not survey-grade verification.
Getting the ground into the job should not consume the job. Automatic topo gives your proposed HDD route a surface profile to work against, so you can start considering cover, entry, exit and the line between them sooner.
Crossings belong in the same picture. Add the roads, rail, rivers and utilities relevant to your route, then review their position and clearance context as you develop the bore. The initial result is a starting point for design and review.
Draw the drill path between your proposed entry and exit. Keep the route grounded in its site context.
Draw in crossings and bring the relevant crossing information into the planning workflow.
Use the resulting profile to develop the shot, inspect rods and refine the route in 2D and 3D.
Automatic topography gets you started. Import survey-grade topo through supported CAD files when you need the detail from a surveyed site.
Automatic terrain is not survey-grade and does not verify buried services. Check the source, units, datum and coordinate alignment of imported survey data. Confirm site conditions, utilities and the design before drilling.
Turn the profile into a pre-bore plan →No. It brings the route, terrain and crossing context into the planning workflow. Refine the bore geometry, review cover and clearances, apply equipment and product limits, and complete the checks required for your job.
Automatic topo provides terrain context; it is not survey-grade. Use suitable verified survey data where the job requires surveyed accuracy. HDD Studio also supports survey-grade topo import through supported CAD files.
Prepare and download the map and topo areas you need before heading away from signal. Availability depends on the area and data source; check the required job information is available on the device before leaving site connectivity.
Register for launch information and choose whether to receive news of subscription discounts.
Register your interest ↗Talk to HDD Studio →